
San Antonio

How to Document Hail Damage to Your Home Before Filing an Insurance Claim

To document hail damage before filing a claim, take clear photos and videos of every damaged area right after the storm, note the date and time, check your roof, siding, windows, and gutters, and write down what you see before you call your insurance company. Good proof means a faster and fairer payout. Hail is a bigger problem than most homeowners think. In 2025, Texas had more hail events than any other state in the country, with 902 reported storms of one inch or larger, according to the Insurance Information Institute. Nationwide, hail and wind claims made up a huge share of home insurance claims in recent years. That means your documentation is not just paperwork. It is the proof that gets your claim paid the right amount. This guide walks you through exactly what to do, in plain simple steps, so you are ready before you ever pick up the phone. Why Documentation Matters So Much Insurance companies do not pay based on your word. They pay based on what you can show them. Good documentation does three things: Proves the damage is real Ties the damage to a specific storm date Shows the full size and scope of the loss Weak or missing proof often leads to lower payouts or denied claims. Strong proof puts you in control of the process from day one. Step 1: Check for Safety First Before you climb a ladder or walk on your roof, stop and think about safety. Look for downed power lines Check for loose shingles or debris on the ground Avoid wet or slippery surfaces Use binoculars or your phone’s zoom to check the roof from the ground if it feels unsafe If anything looks risky, wait for a professional. No photo is worth an injury. Step 2: Take Photos and Videos Right Away Time matters. Hail marks can fade, and rain can wash away granules from shingles. Document as soon as it is safe to do so. What to photograph: Each side of your house, from a distance Your full roof, if you can safely see it Close-up shots of every dent, crack, or bruise Gutters, downspouts, and vents Window screens and window frames Siding, fences, and any outdoor furniture Your AC unit or HVAC equipment How to shoot it right: Use good lighting, natural daylight works best Take wide shots first, then move in close Shoot from a few angles so the damage is easy to see Record a short video walking around your property and describing what you see Step 3: Look for These Specific Signs of Hail Damage Hail damage is not always obvious. Here is what to look for in different parts of your home. Roof Dark spots or bruises on shingles Granule loss (bald patches on asphalt shingles) Cracked or split shingles Dented vents or flashing Siding and Exterior Paint Small dents or dings in siding panels Chipped or cracked paint Cracks near corners, trim, or seams Hail impacts often chip or crack exterior paint even when the siding underneath looks fine at first glance. That is why a close, careful check matters just as much as the roof. Gutters and Metal Round dents in gutters or downspouts Dents in AC units or metal vents Soft metal shows hail damage clearly, even when other parts of your home look okay. Adjusters often check this first. Step 4: Mark the Damage Use light chalk to circle confirmed hail hits on your roof or siding before photographing them again. This makes the damage easier to spot in your photos. Only mark real hits, not guesses. Too many marks can make your documentation look less reliable. Step 5: Write a Simple Damage Log Photos tell part of the story. A written log fills in the rest. Include: Date and time of the storm Date and time you inspected the damage List of areas affected (roof, siding, gutters, windows, etc.) Rough count of hits per section Any related issues, like a leak or water stain inside your home A simple note like “8 dents on the north side siding, 3 cracked shingles on the back slope” can carry real weight with your adjuster. Step 6: Gather Supporting Proof A few extra pieces of evidence can strengthen your claim even more. Local weather reports or storm alerts from the day of the hail Screenshots of news coverage about the storm Photos from neighbors, if damage is spread across the block Any repair estimates you already have Step 7: Organize Everything Before You File Once you have your photos, video, and notes, put them in one place. Create a labeled folder on your phone or computer Back up your files online or by email so you do not lose them Sort photos by area of the house Match your written notes to the matching photos This makes it easy to hand everything to your insurance adjuster and much harder for a claim to be delayed over missing proof. Common Mistakes to Avoid Waiting too long to take photos Only photographing the roof and skipping siding, gutters, and windows Taking blurry or dark photos Not writing anything down Starting repairs before your insurance company has reviewed the damage Avoiding these mistakes alone can make the difference between a smooth claim and a frustrating one. What Happens After You File Once you submit your documentation, an adjuster will usually schedule an inspection. Having your own detailed photos and notes ready means you are not relying only on their walkthrough. If your home has both roof and exterior paint damage, having clear before photos of your home’s condition also helps once repairs and repainting begin. Why Choose River City Painting Hail storms do not just damage roofs. They chip paint, crack caulking, and leave dents and marks across siding, trim, and fascia boards. River City Painting has helped homeowners across San Antonio restore their homes after storm damage with careful, professional interior painting and exterior painting. Our team understands what insurance

freshly power washed commercial storefront in San Antonio
San Antonio

Why Commercial Properties Need Routine Power Washing in San Antonio

Routine power washing protects your commercial building from mold, stains, and slow surface damage while it keeps your property looking sharp for every customer who walks by. In San Antonio, heat, humidity, and pollen build up fast on brick, concrete, and stucco. Skipping regular cleaning lets that buildup eat into your property value and your first impression. San Antonio adds thousands of new residents and businesses every year, and the metro keeps growing at a steady pace thanks to its strong retail and job market. More people means more eyes on your building. A dirty storefront or grimy parking lot can quietly push potential customers toward a cleaner competitor down the street. The EPA also warns that mold and moisture buildup on commercial buildings can lead to real health and safety issues for employees and customers if left untreated. That is one more reason routine power washing belongs on every property owner’s maintenance list, not just the “someday” list. What Happens When You Skip Routine Power Washing Dirt does not just sit quietly on your building. It works against you every single day. Mold and algae spread faster in San Antonio’s humid months Grime traps heat, making your HVAC system work harder Oil and dirt stains sink deeper into concrete over time Cracks in sidewalks and parking lots hide under layers of buildup Neglected exteriors chase away new customers before they even walk in Small problems left alone turn into big repair bills. A stain you could power wash away today might need costly concrete or masonry repair in a year. Curb Appeal Brings In More Customers Your building’s exterior is your silent salesperson. Customers driving down Broadway, San Pedro Avenue, or through the Pearl District judge your business before they ever open the door. A clean storefront tells people you care about quality. A dirty one tells them to keep driving. Power washing removes: Dirt and dust buildup on walls and windowsills Bird droppings and pollen stains Grease and oil spots in parking lots Mold and mildew streaks on stucco and brick Gum and grime on sidewalks and entryways Clean surfaces make your business look active, professional, and trustworthy from the street. Power Washing Protects Your Property Investment Your building is one of your biggest business assets. Routine cleaning protects that investment in a few clear ways. It Stops Long-Term Surface Damage Mold, algae, and grime break down paint, stucco, and concrete over time. Cleaning surfaces regularly helps prevent that kind of structural wear before it turns into an expensive repair job. It Extends the Life of Your Paint Job A fresh coat of exterior paint only lasts as long as the surface underneath stays clean. Dirt and moisture trapped under paint cause peeling and bubbling much faster. Many San Antonio property owners pair power washing with a commercial painting service in San Antonio to protect their investment for years, not months. It Keeps Your Property Value Strong A well-kept exterior supports a stronger resale or lease value. Commercial tenants and buyers notice deferred maintenance right away, and it often becomes a bargaining chip during negotiations. Health and Safety Reasons to Power Wash Regularly Power washing is not only about looks. It plays a real role in keeping your property safe. Removes mold and mildew that can affect indoor and outdoor air quality Clears oil and algae from walkways, cutting down on slip and fall risks Removes bacteria buildup around dumpster pads and loading areas Keeps parking lots and sidewalks free of debris that can trip up visitors A safer property means fewer liability headaches for you as a business owner. How Often Should San Antonio Businesses Power Wash? There is no single answer for every property, but here is a simple guide based on what most San Antonio businesses need. Property Type Recommended Frequency Restaurants and food service Every 1 to 2 months Retail storefronts Every 3 months Office buildings Every 6 months Warehouses and industrial sites Every 6 to 12 months Parking lots and garages Every 6 months High-traffic areas near I-35, the Medical Center, and downtown San Antonio often need more frequent service because of extra dust, exhaust, and foot traffic. Signs Your Property Needs Power Washing Now Do not wait for buildup to become obvious to every customer. Watch for these signs. Dark streaks on exterior walls A musty smell near entrances or dumpsters Slippery patches on sidewalks or ramps Visible mold spots near windows or gutters Oil stains spreading across parking lot surfaces If you notice two or more of these, it is time to schedule a cleaning. Ready to protect your property before small stains turn into big problems? Get a free estimate from River City Painting today. Why Choose River City Painting River City Painting has spent more than 7 years helping San Antonio businesses keep their properties clean, protected, and looking their best. With over 260 five-star Google reviews, local business owners trust our team to show up on time, work efficiently, and deliver results that hold up. We offer both commercial painting and power washing service in San Antonio, so property owners can handle exterior maintenance and fresh paint through one reliable team instead of juggling multiple contractors. Our crews serve businesses across San Antonio and the surrounding areas, from small storefronts to large commercial complexes, always with the same attention to detail and respect for your schedule. Whether your building needs a deep clean before a repaint or routine upkeep to stay ahead of grime, our team brings the right equipment and experience to get it done right the first time. Want to see the difference a professional clean can make? Contact River City Painting and get your free quote today. Our team also handles the full job when your building needs more than a clean surface. Explore our power washing service in San Antonio to see how we can help protect your property year round. Conclusion Routine power washing keeps your San Antonio commercial property looking professional,

professional painter applying interior wall paint in a bright, modern San Antonio home
San Antonio

VOC Regulations in Bexar County: What “Low-VOC Required” Actually Means for Your Repaint

If your painter told you that your repaint needs “low-VOC” paint, here is the short answer: Bexar County is under stricter state air rules now, and some paints sold or used here must meet lower VOC limits than in other parts of Texas. This is not a scare tactic from your contractor. It is a real rule from the Texas Commission on Environmental Quality (TCEQ), and it affects what paint gets used on your home or business. Bexar County was placed under serious nonattainment status for ozone under the 2015 federal ozone standard. Because of this, TCEQ adopted new rules in 2024 that apply stricter VOC (volatile organic compound) limits to coatings used in the county, with a compliance deadline of January 1, 2025. This is not a local city ordinance. It is a state-level air quality rule tied to federal Clean Air Act requirements, and it directly affects paint products used in San Antonio, Alamo Heights, Stone Oak, and the rest of Bexar County. For homeowners, this mostly means one thing: your painter should be using paint that meets these lower VOC limits. Here is what that actually means for your project. Why Bexar County Has These VOC Rules Ozone forms when VOCs react with sunlight and heat. San Antonio gets a lot of both. When ozone levels get too high, the U.S. Environmental Protection Agency (EPA) classifies the area as “nonattainment,” meaning the air does not meet federal health standards. Bexar County was first classified as a moderate nonattainment area in 2018. In 2023, it was reclassified to serious nonattainment. That reclassification triggered stricter rules across many industries, including paint and coatings, because VOCs from coatings are a real contributor to ozone formation. TCEQ’s response was to update 30 TAC Chapter 115, the state rule covering VOC emissions from coatings and other sources. These updates set new VOC limits for many coating categories used in construction and repainting work. What “Low-VOC Required” Means for Your Paint Job In plain terms, low-VOC paint has less of the chemical compounds that evaporate into the air as the paint dries. Regular paint releases more of these compounds. Low-VOC paint releases far less. For your repaint, this means: Your painter should be using coatings that meet Bexar County’s current VOC limits Some paint products sold elsewhere in Texas may not be legal to use here Low-VOC does not mean lower quality. Most major paint brands now make low-VOC versions with the same durability and finish options This applies to both residential and commercial jobs, though commercial and industrial coatings can face additional rules depending on the facility Does This Affect Interior or Exterior Painting More? Both are covered, but the practical impact shows up mostly in product selection rather than in how the work gets done. Interior Painting Interior air quality matters even more once VOC limits are considered. Lower VOC paints mean less odor, faster off-gassing, and a safer environment for your family right after the job is done. If you are planning interior painting, ask your contractor directly which paint line they plan to use and confirm it meets current VOC limits. Exterior Painting Exterior coatings, primers, and sealers are also covered under the updated rules. Since San Antonio’s heat and humidity already put stress on exterior paint, using a compliant, well-formulated low-VOC coating actually helps with longevity too. For exterior painting projects, this is one more reason to work with a painter who already tracks these rule changes instead of guessing. What This Means for Commercial Properties Commercial buildings, especially larger ones near the medical center, downtown, or the Pearl district, may have additional reporting or product requirements depending on square footage and coating volume. Property managers and business owners should confirm with their contractor that all coatings used meet Chapter 115 requirements before work begins. If you manage a commercial property, commercial painting crews should already be familiar with these rules and use compliant products as standard practice, not as an upcharge or afterthought. How to Know If Your Painter Is Following the Rules You do not need to become an air quality expert. A few simple questions will tell you what you need to know: Ask which paint brand and product line they use Ask if it is labeled low-VOC or zero-VOC Ask if they are aware of the Bexar County compliance deadline Ask to see the product data sheet if you want to confirm VOC content yourself A contractor who cannot answer these questions clearly may not be tracking current regulations, which could leave you using non-compliant coatings without knowing it. Common Myths About Low-VOC Paint Myth: Low-VOC paint does not last as long. This was true years ago. Today’s low-VOC formulas from major manufacturers perform just as well as traditional paint. Myth: Low-VOC only matters for big commercial jobs. The rules apply broadly across coating categories, and many residential projects are affected too. Myth: This is a San Antonio city rule. It is a state rule from TCEQ, tied to federal ozone standards, and it applies countywide, not just within city limits. Why Choose River City Painting River City Painting has served San Antonio homeowners and businesses for more than 9 years, and we have built our reputation on more than 260 five-star reviews on Google. We know Bexar County’s VOC rules because we work here every day, and we already use paint products that meet current low-VOC requirements on interior painting, exterior painting, cabinet painting, fence and deck painting, door painting, and deck staining projects. Our team also handles drywall repair and power washing, so your surfaces are properly prepped before any paint goes on. Whether you need residential painting for a home near Alamo Heights or commercial painting for a property near downtown San Antonio, we bring the same attention to compliance, prep work, and finish quality to every job. If you are ready to start your project with a team that already understands the rules, request a free quote from River

painter applying protective coating to a large industrial metal structure or warehouse exterior
San Antonio

How to Choose an Industrial Painting Contractor in San Antonio

The right industrial painting contractor in San Antonio protects your equipment, meets safety codes, and finishes the job on time. Look for proper licensing, proof of insurance, safety certifications, a strong local track record, and clear written quotes before you sign anything. Industrial coatings are big business for a reason. The global protective coatings market is expected to keep growing each year, driven by demand from manufacturing plants, warehouses, and energy facilities that need surfaces protected from rust, chemicals, and heavy wear. A bad paint job on a plant floor or steel structure does not just look wrong. It can lead to corrosion, safety hazards, and expensive repairs down the road. That is why picking the right team matters so much. This guide breaks down exactly what to look for, step by step, so you can hire with confidence. Why Industrial Painting Is Different From Regular Painting Industrial jobs are not like painting an office wall. These projects often involve: Metal structures, tanks, or warehouse floors that face rust and chemical exposure Strict safety rules for working at heights or near equipment Coatings built to handle heat, moisture, or heavy foot traffic Tight schedules that cannot disrupt daily plant operations Because of this, your contractor needs real industrial experience, not just a general painting background. Key Factors to Check Before You Hire 1. Licensing and Insurance Always ask for proof of a valid contractor license and current insurance. This protects your business if something goes wrong on the job site. A contractor without proper coverage puts you at financial risk. 2. Safety Record and Training Industrial painting often means working at heights, in tight spaces, or near heavy machinery. Ask about their safety training program and how they handle job site hazards. According to the Occupational Safety and Health Administration, employers are responsible for providing a workplace free from recognized hazards, so a contractor with a strong safety culture keeps your team and property protected. You can review general workplace safety standards on the OSHA website. 3. Experience With Industrial Projects Ask to see photos or references from past industrial jobs, not just homes or small offices. A contractor who has painted warehouses, plants, or steel structures in San Antonio will understand local weather, humidity, and building codes. 4. Surface Prep and Coating Knowledge Good industrial painting starts with proper surface prep. Rust removal, degreasing, and priming all matter before a single coat goes on. Ask your contractor what prep steps they follow and what coatings they recommend for your specific surface. 5. Clear, Detailed Quotes A trustworthy contractor gives you a written quote that spells out labor, materials, prep work, and timeline. Avoid vague estimates. Hidden costs are one of the biggest complaints property owners have after a paint job goes wrong. 6. Local Knowledge of San Antonio San Antonio’s climate brings hot summers and heavy spring rain. Areas near Brooks City Base, Port San Antonio, and the industrial corridors along I-35 and Loop 410 see a lot of wear on exterior surfaces. A local contractor understands how weather here affects coating choice and drying time. 7. Communication and Timeline Ask how the contractor plans to keep your operations running during the project. Good contractors offer flexible scheduling, including night or weekend work, so your business does not lose productivity. Common Mistakes to Avoid Choosing the lowest bid without checking experience Skipping the license and insurance check Not asking about surface prep steps Ignoring online reviews and references Signing a contract without a clear scope of work If you want expert help planning a bigger project, our team also handles commercial building painting services across San Antonio, so you get one trusted crew for both industrial and commercial needs. What to Ask During Your First Call Before you hire anyone, ask these questions: How many years have you worked on industrial projects? Can you share references from similar jobs? What is included in your written quote? How do you handle surface prep and rust removal? What safety measures do you follow on site? A contractor who answers clearly and confidently is usually a good sign. One who dodges these questions is a red flag. Ready to get a straight answer to these questions? Call River City Painting today and get a free, no pressure quote for your project. Why Choose River City Painting River City Painting has built a strong reputation across San Antonio, TX for honest work and quality results. We handle both residential painting and commercial painting projects, working with property owners who want a team that shows up on time, communicates clearly, and finishes the job right the first time. Our crew understands San Antonio’s climate and how it affects paint performance, from the summer heat to spring humidity, and we plan every project around that. Whether you are updating a single room in your home or repainting a large commercial building, we bring the same level of care and attention to detail. We keep our quotes clear and our timelines realistic, so you always know what to expect. If you are searching for a painting team that treats your property like their own, River City Painting is ready to help. Get in touch with River City Painting today to talk through your project and get a free quote. Choosing the Right Fit Takes a Little Homework Picking a painting contractor does not need to be stressful. Check their license, ask about safety, review past work, and get everything in writing. These simple steps help you avoid costly mistakes and get a paint job that lasts for years. For more on choosing quality coatings and their environmental impact, the EPA’s guide on paint and coatings is a helpful resource. FAQs How do I know if a contractor is licensed in San Antonio? Ask them directly for their license number and verify it with the Texas Department of Licensing and Regulation. How long does an industrial painting job usually take? It depends on size, but most

stucco crack near a window corner on a San Antonio-style stucco home
San Antonio

Why San Antonio’s Caliche Soil Causes Stucco Cracking That Paint Alone Can’t Fix?

San Antonio’s caliche soil can cause stucco to crack because it expands and contracts with changes in moisture, creating movement in the foundation and walls above it. As the stucco shifts, cracks can form and return even after they are covered with fresh paint. Paint may hide minor surface imperfections, but it cannot correct the underlying movement or repair damaged stucco, which is why proper crack repair and surface preparation are necessary for a lasting finish. This is one of the most overlooked reasons stucco keeps cracking across San Antonio. Most homeowners blame old age or bad paint. The real cause is often right under their feet. The Texas Department of Insurance and local soil surveys have long noted that large parts of Bexar County sit on caliche and expansive clay layers, which are known to cause foundation movement in homes across Central Texas. This is not a rare problem. It is a regional one. In this guide, you will learn: What caliche soil is and why San Antonio has so much of it How soil movement turns into stucco cracks Why repainting alone will not solve the problem The correct repair order before you ever pick up a paint brush What Caliche Soil Is and Why It’s Common in San Antonio? How Caliche Forms and Where It’s Most Prevalent Locally Caliche is a hard, chalky layer of soil. It forms when calcium carbonate builds up in the ground over a long time. Rain washes minerals down. The minerals settle and harden. Over many years, this creates a cement-like layer under the topsoil. San Antonio sits on a mix of limestone and caliche-rich soil. This is common in areas near the Hill Country edge, including neighborhoods around Stone Oak, Alamo Heights, and parts of the Northwest Side. Builders often hit this hard layer when digging foundations. Why It Behaves Differently From Typical Clay Soil Caliche is hard when dry. But it is not stable. It still absorbs water, just slower than clay. When it finally does absorb water, it can shift in an uneven way. Some parts of the foundation stay firm. Other parts sink or lift slightly. This uneven movement is worse than steady, even movement. It puts twisting pressure on a foundation. That twisting pressure is what usually cracks stucco walls. How Soil Movement Leads to Stucco Cracking? Foundation Shift Patterns Tied to Caliche Expansion and Contraction Stucco is rigid. It does not stretch. When the foundation under it shifts even a small amount, the stucco has nowhere to go but crack. Common patterns homeowners see: Diagonal cracks near window and door corners Stair-step cracks along stucco seams Cracks that widen after heavy rain, then seem to close up in dry months These patterns point to soil movement, not just surface wear. Why Hairline Cracks Often Return After Repainting? A fresh coat of paint can hide a hairline crack for a while. But paint has almost no flexibility. As soon as the soil shifts again, the same spot cracks open. This is why so many San Antonio homeowners find themselves repainting the same wall every year or two. Why Repainting Alone Doesn’t Solve the Underlying Problem? The Difference Between Cosmetic Patching and Structural Repair Cosmetic patching fills the crack and paints over it. It looks good for a short time. It does nothing to address the soil movement causing the crack. Structural repair looks at why the crack formed. It may involve: Proper crack routing and filling with flexible material Checking for ongoing foundation movement Addressing drainage issues that feed water to the soil under the slab Skipping straight to paint is like covering a leak with a towel instead of fixing the pipe. When to Bring in a Foundation Specialist First If you notice any of these signs, get a foundation specialist involved before repainting: Cracks wider than a quarter inch Doors or windows that stick or no longer close right Cracks that keep growing over a few months Visible gaps between the stucco and window trim A quick inspection can save you from repainting a wall that will just crack again. The Right Repair Sequence Before Repainting Stucco Crack Assessment and Elastomeric Patching Methods Every crack should be checked before it gets patched. Small hairline cracks are usually fine to patch directly. Larger or repeating cracks need a closer look at the cause. Once the cause is addressed, the repair process usually includes: Cleaning out the crack Filling it with a flexible patching compound Smoothing it to match the surrounding texture Letting it cure fully before any coating goes on Rushing this step is one of the biggest reasons stucco repairs fail early. Choosing Flexible Coatings Suited to Soil-Movement Areas Standard paint is rigid. In soil-movement areas like much of San Antonio, elastomeric coatings work better. They stretch slightly with small foundation shifts instead of cracking right away. If your home has a history of stucco cracking, ask about elastomeric coating options before your next repaint. It is a small upgrade that can add years of protection. Thinking about a repaint but worried the cracks will just come back? Talk to a stucco repair team before scheduling paint day. A proper assessment now can save you a repeat project later. Why Choose River City Painting River City Painting has worked on homes across San Antonio and understands how local soil conditions affect stucco exteriors, not just how they look on the surface. Our team inspects cracks before recommending any coating, so homeowners are not paying to repaint a problem that will simply return. We handle stucco repair, crack patching, and exterior painting for homes in San Antonio and surrounding communities. Ready to stop the cycle of repainting the same crack every year? Get a free estimate for your next exterior project. Conclusion Caliche soil is a real and common reason stucco cracks across San Antonio. Paint alone cannot stop soil from moving, so it cannot stop the cracks from coming back. The lasting fix starts

San Antonio concrete driveway, showing dark algae streaks on one half and clean concrete on the other
San Antonio

What Causes Black Streaks on Your Sidewalk and Driveway?

Black streaks on your driveway or sidewalk are almost always caused by a living organism called Gloeocapsa magma, a type of algae that feeds on moisture and the limestone in concrete. This same organism is behind the dark streaks seen on millions of roofs and driveways across the country, and researchers have tracked its spread across the U.S. for over 20 years as humidity levels rise in many regions. In San Antonio, our hot days, sudden summer storms, and humid nights create the perfect home for it.  The good news is that once you know what causes it, getting rid of it is simple. What Causes Black Streaks on Your Driveway and Sidewalk Black streaks are not just dirt that will wash away with a garden hose. They come from a few specific sources, and knowing which one you have helps you pick the right fix. Algae and Mold Growth Most black streaks come from algae or mold. These tiny organisms land on your concrete as spores floating in the air. Once they find a damp, shaded spot, they grow fast. Concrete is porous, so it soaks up rain and holds moisture in tiny pockets. That trapped moisture is exactly what algae needs to spread. Humidity and Heat in San Antonio San Antonio summers bring high heat mixed with sudden bursts of humidity, especially after a storm rolls through neighborhoods near the Riverwalk or Brackenridge Park. That mix of warmth and moisture speeds up algae growth on any concrete surface that does not dry out quickly. Shade From Trees and Structures Driveways and sidewalks under large oak trees or shaded by a house rarely get full sun. Without direct sunlight to dry the surface, moisture lingers for hours after rain or sprinkler use. Shaded concrete almost always shows black streaks first. Tire Marks and Vehicle Fluids Not every black mark is biological. Tire rubber can leave dark streaks where cars turn or brake. Oil, transmission fluid, and other vehicle leaks also leave black or dark brown spots, usually right where a car is parked most often. Rust From Metal Objects Rust stains can look black from a distance but usually carry a reddish or orange tint up close. These come from patio furniture, sprinkler heads, fences, or tools left sitting on the concrete. Poor Drainage and Standing Water If water pools on your driveway after rain instead of draining away, that standing water feeds algae and mold. Cracked concrete, low spots, and clogged gutters near your driveway all make this worse. Are Black Streaks on Concrete Harmful Black streaks are more than a cosmetic problem. Here is why they matter. Slip risk. Algae makes concrete slippery when wet, which is a real hazard for kids and older family members. Curb appeal. Buyers and neighbors notice a stained driveway before anything else about your home’s exterior. Long-term damage. Left alone, algae and mold can slowly wear down the surface of your concrete over time. Spreading. Algae spores travel by wind and water runoff, so one patch can spread to your sidewalk, patio, or even nearby siding. The U.S. Environmental Protection Agency confirms that mold and algae need moisture to grow, which is exactly why shaded, damp concrete surfaces are the most common trouble spots. How to Remove Black Streaks From Your Driveway You have a few options depending on how bad the staining is. DIY Cleaning Methods Dish soap and water. Works for very light, fresh streaks only. Vinegar solution. Can lighten mild algae spots but will not kill deep roots. Store-bought concrete cleaner. Helps with surface stains but rarely removes older buildup. Rented pressure washer. Can work, but the wrong PSI or nozzle angle can etch or damage your concrete. Why Professional Cleaning Works Better A professional cleaning uses the right pressure, the right nozzle, and cleaning solutions made to kill algae at the root, not just blast away what you can see. This means the stains take longer to come back. If your driveway or sidewalk has heavy, older staining, a concrete driveway cleaning done by a trained team will save your concrete from damage while giving you a deeper clean than a rental machine ever could. Ready to get your driveway looking new again? Get a free estimate and see what a professional clean can do. How to Keep Black Streaks From Coming Back Cleaning is only half the job. These steps help slow down regrowth. Trim back tree branches so more sunlight reaches your driveway and sidewalk. Clear leaves and debris regularly, since organic matter feeds algae and mold. Fix drainage problems so water does not pool near your entryway or garage. Move planters and metal furniture off bare concrete to avoid rust and trapped moisture. Schedule routine sidewalk pressure washing service every six to twelve months, especially for shaded areas. Consider sealing your concrete after cleaning to make it harder for algae to take hold again. According to the Concrete Network, discoloration on concrete can come from a wide mix of causes, which is why a proper cleaning and prevention plan matters more than a one-time scrub. Why Choose River City Painting River City Painting has over 5 years of experience helping San Antonio homeowners maintain beautiful, well-kept properties, backed by 260+ five-star Google reviews. From power washing driveways and sidewalks to residential painting, exterior painting, and deck staining, our team handles all your exterior needs with care. Whether you need professional concrete driveway cleaning or a complete exterior refresh, we deliver reliable, high-quality results.  Not sure if it is algae, rust, or something else? Request a free estimate and let our team take a look. Conclusion Black streaks on your driveway or sidewalk almost always come down to algae, moisture, shade, or a mix of all three. San Antonio’s heat and humidity make it a common problem, but it is one you can solve with the right cleaning approach and a little upkeep afterward. Catching it early keeps your concrete safer, cleaner, and easier

A wide shot of a bright, sunlit room mid-painting, with a canvas drop cloth neatly taped down over hardwood floors, a paint tray, and a roller in the foreground
San Antonio, Home Painting

How to Protect Floors While Painting Your House

A recent home improvement survey found that floor damage is one of the top three complaints homeowners have after a DIY paint job. Paint spatter can stain wood, soak into carpet, and even seep into grout lines on tile. The good news is that protecting your floors takes just a few extra minutes and can save you hours of cleanup and costly repairs later. Whether you live near the River Walk, in Alamo Heights, or out by Stone Oak, this guide will show you exactly how to keep your floors safe while you paint. Why Floor Protection Matters Paint splatters are not just annoying. They can cause real damage. Wet paint can soak into unfinished wood and leave permanent stains Latex paint can trap moisture under carpet fibers and cause mold over time Dried paint drops on tile can be tough to scrape off without scratching the surface Foot traffic can grind dust and grit into wet paint spots, making stains worse Taking a few steps before you paint protects your floors and keeps your whole project looking clean and professional. Step 1: Clear the Room First Before you touch a paintbrush, clear the space. Move furniture out of the room if you can Push large pieces you cannot move to the center and cover them Remove rugs and floor mats completely Take out small items like lamps, toys, and decor A clear room gives you more space to work and less to protect. Step 2: Clean the Floor Before You Cover It This step gets skipped a lot, but it matters. Dust, dirt, and grit under a drop cloth can scratch your floor as you walk on it. Sweep or vacuum the entire floor first. If you have hardwood floors, this step is extra important since sand and dust can scuff the finish. Step 3: Choose the Right Floor Protection Not all floor coverings work the same way. Here is a simple breakdown. Best Drop Cloth for Painting Floors Canvas drop cloths are the top choice for most painting jobs. They are heavy, they do not slip around, and they soak up drips instead of letting paint pool and spread. Canvas also lays flat and stays put better than plastic, so it is safer to walk on. Plastic sheeting is cheaper and works well for short jobs, but it can get slippery and does not absorb spills. If paint pools on plastic, it can smear when you step on it. Rosin paper is another solid option, especially for hardwood floors. It is thick, affordable, and taped down easily along the edges. How to Protect Hardwood Floors When Painting Hardwood needs extra care since spills can soak into the wood grain and stain permanently. Lay rosin paper or canvas drop cloths across the entire floor Tape the edges down with painter’s tape, not regular tape, so it does not damage the finish Avoid plastic alone since it can be slippery on hardwood Wipe up any spills immediately, even through the covering How to Protect Carpet When Painting Carpet soaks up spills fast, so quick action matters. Use canvas drop cloths or thick plastic sheeting with a non-slip backing Tape the covering down along the baseboards so it does not shift Avoid thin plastic sheets that bunch up and create tripping hazards Keep a damp cloth nearby for instant spot cleaning Protecting Tile and Vinyl Floors Tile and vinyl are more resistant to stains but can still get scratched or scuffed. Use canvas or rosin paper to prevent slipping Watch for grout lines, which can trap wet paint if not covered well Wipe drips quickly since dried paint on tile is harder to remove Step 4: Tape the Edges the Right Way Loose drop cloths shift as you walk, which leaves gaps where paint can sneak through. Run painter’s tape along the baseboards to hold the covering in place Overlap sheets by a few inches so there are no open seams Check the tape halfway through your project since foot traffic can loosen it Step 5: Set Up a No Paint Zone Keep your paint cans, trays, and rollers in one spot instead of moving them around the room. Use a small table or bench with its own protective covering Keep your ladder on a covered section to avoid drips from the tray Place a designated spot near the door for wiping brushes and rollers Step 6: Clean Up Fast, Not Later The longer paint sits, the harder it is to remove. Wipe fresh drips right away with a damp cloth Keep a small bucket of water and rags within reach at all times For latex paint, warm water usually works. For oil-based paint, you may need mineral spirits If you are planning a full home refresh, our team also handles drywall repair before painting begins, so your walls are smooth and ready before any protective covering goes down. Common Mistakes to Avoid Using regular masking tape instead of painter’s tape, which can peel paint or leave residue Skipping the sweep or vacuum step before laying down coverings Leaving gaps between drop cloths where drips can slip through Waiting too long to clean up spills Using thin plastic on high traffic areas where it can tear or slide Choose River City Painting For a Mess Free Interior Painting We have been serving San Antonio homeowners for over 5 years, and we have earned more than 260 five star reviews on Google along the way. Our crews always show up prepared with professional grade drop cloths, floor coverings, and taping systems so your home stays protected from the first brushstroke to the final coat. We offer a full range of services to fit whatever your home needs, from interior painting and exterior painting to cabinet painting and door painting. If your outdoor spaces need attention too, we also handle fence and deck painting, deck staining, and power washing to get every surface looking its best. Whether you need residential painting for

Driveway cleaning in suburban setting
San Antonio

Can Power Washing Remove Oil Stains from Concrete Driveways?

Have an oil stain on your driveway that just won’t go away? You’re not alone. Oil stains are one of the most common concrete cleaning challenges homeowners face, especially on driveways and garage floors. The good news is that professional power washing can often remove or greatly reduce these stubborn stains, helping restore your concrete’s clean, well-maintained appearance.  San Antonio’s hot summers make oil stains worse than they would be in a cooler climate. Heat opens up the pores in your concrete, so oil sinks in deeper and faster. The American Cement Association notes that concrete’s porous makeup is exactly why liquids like oil can soak in and stain the surface over time, which is why the right cleaning approach matters so much. Why Oil Stains Are So Stubborn on Concrete? Your driveway may look solid, but concrete is full of tiny holes. Think of it like a hard sponge. When oil drips on it, the oil does not just sit on top. It seeps down into those little holes and grips onto the minerals inside. This is why a garden hose never works. You need two things working together. High pressure breaks up the top layer of oil and grime A strong degreaser dissolves the oil trapped deep in the pores Skip the degreaser and you are just pushing water around. The stain stays put. Why Some Oil Stains Are Harder to Remove Than Others? Not every oil stain responds the same way. A few things change the outcome. Age of the Stain Fresh stains lift out fast. Oil that has been sitting for years soaks in deep and may only lighten instead of vanish completely. Type of Oil Motor oil, transmission fluid, and cooking grease all behave differently. Heavier oils need stronger degreasers and more scrubbing. Condition of Your Concrete Sealed concrete resists stains because the oil mostly stays on the surface. Bare, porous concrete lets oil travel straight down. San Antonio Heat Our summers push concrete surface temperatures well above the air temperature. Hot concrete has open pores, so oil spreads faster and deeper. Catching a fresh drip quickly makes a real difference here. Best PSI and Nozzle Tips for Concrete Driveways Using the wrong pressure can either leave the stain behind or damage your driveway. Here is a simple guide. Surface Recommended PSI Concrete driveways 2,500 to 3,000 PSI Garage floors (concrete) 2,000 to 3,000 PSI Pavers 1,500 to 2,500 PSI Sealed decorative concrete 1,500 to 2,000 PSI Nozzle tips matter too. 25 degree nozzle (green tip): Best all-around choice for concrete 15 degree nozzle (yellow tip): Stronger, use with care on stubborn spots 0 degree nozzle (red tip): Avoid this one. It can etch and damage your concrete How Professionals Remove Oil Stains from Concrete? 1. Absorb Fresh Spills First If the oil just spilled, grab kitty litter, baking soda, or sawdust. Cover the spot and let it soak up the surface oil for a few hours before sweeping it away. 2. Apply a Concrete Degreaser Pour a degreaser made for petroleum stains directly on the spot. Regular soap will not cut it for older stains. 3. Let It Sit Give the degreaser 10 to 20 minutes to break down the oil. Do not let it dry out on the surface. 4. Scrub With a Stiff Brush Work the degreaser into the concrete. This step helps the cleaner reach oil trapped deep in the pores. 5. Power Wash the Area Use a 25 degree nozzle at 2,500 to 3,000 PSI. Move in slow, overlapping passes starting from the outside edge and working toward the center. 6. Repeat If Needed Older, deeper stains often need a second round. Let the area dry, check your progress, and reapply degreaser if the stain is still visible. If your driveway has stains near the Pearl District or along the River Walk area homes, the same process works well since San Antonio’s concrete faces similar sun exposure citywide. If DIY methods are not delivering the results you want, professional help can make a big difference. At River City Painting, our power washing services regularly tackle stubborn oil stains using commercial-grade degreasers and professional equipment designed to clean deeper than most rental machines. This allows us to remove more buildup, improve the appearance of your concrete, and help restore your driveway, patio, or garage floor.  Common Mistakes to Avoid Skipping the degreaser and only using water Using a 0 degree red nozzle, which can etch your concrete Letting the cleaner dry before rinsing Standing too close to the surface with high pressure Ignoring where the runoff goes, since oil can reach storm drains Pressure washers are powerful tools, and the Consumer Product Safety Commission recommends wearing eye protection and keeping a safe distance from the nozzle to avoid injury while cleaning. What to Do After the Stain Is Gone? Once your driveway is clean, consider sealing it. A concrete sealer acts like a shield. Future spills sit on top of the surface instead of soaking in, which makes cleanup much easier down the road. Sealing is not permanent. Most sealers need to be reapplied every few years, but it is one of the easiest ways to protect your investment. If you ever need to dispose of old cleaning chemicals or degreaser containers, the Environmental Protection Agency offers guidance on handling household chemicals safely. Why Choose River City Painting River City Painting has spent 5+ years helping San Antonio homeowners keep their properties looking sharp, backed by 260+ 5-star reviews on Google. Our team treats every driveway, patio, and walkway with the same care we bring to every paint job, because a clean surface is the first step toward a great looking home. Beyond power washing, we handle the full range of home improvement work. That includes interior painting, exterior painting, cabinet painting, fence and deck painting, door painting, drywall repair, and deck staining. Whether your home needs a full refresh or just a clean driveway, our crew shows up ready

Suburban home with Mediterranean charm
San Antonio

Can You Power Wash a Stucco Home in San Antonio?

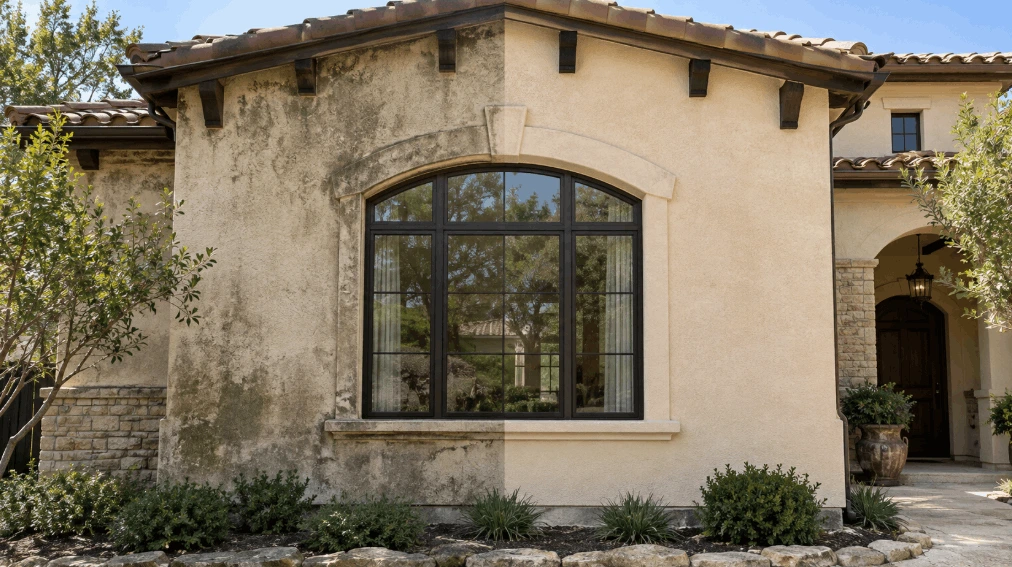
Stucco is one of the most popular exterior finishes on homes throughout San Antonio, from Alamo Heights to Stone Oak. It looks great. It holds up well in Texas heat. But it has one weak spot: high pressure water. A stucco wall is not like a brick wall or a concrete driveway. It has a thin, textured coat over a softer base layer. Using incorrect pressure washer settings can damage stucco by causing cracks, removing paint, or forcing water behind the surface, where hidden moisture problems can develop. The real danger is what happens beneath the surface. Water that gets trapped behind stucco can remain hidden for months, creating the perfect conditions for mold growth, wood rot, and structural deterioration. By the time visible signs appear, the damage may already be extensive and expensive to repair. So, is power washing safe for stucco? Not usually. A safer alternative is soft washing, which effectively cleans stucco without the risk of cracks, paint damage, or moisture intrusion. Here’s what San Antonio homeowners should know before hiring a stucco cleaning company. Why Stucco Reacts Differently Than Other Surfaces Stucco is made from cement, sand, and lime. It goes on in layers over a wire mesh base. This makes it strong against Texas sun and heat, but it is not built to take a direct hit from a high pressure water jet. Here is what can go wrong when stucco meets standard power washing: Cracks and chips. High pressure water breaks down the surface layer over time, especially at seams and corners. Water intrusion. Water can force its way behind the stucco through hairline cracks, old caulking, or window trim. Faded or stripped paint. Painted stucco can lose its topcoat fast under strong pressure, leaving patchy, dull walls. Mold growth you can’t see. Trapped moisture behind the wall feeds mold and mildew long after the surface looks dry. Most stucco damage is not caused by a single major mistake. Instead, it occurs when water finds its way into the wall system through small gaps around windows, doors, and rooflines and then becomes trapped with no way to escape. This type of moisture intrusion is one of the leading causes of stucco deterioration, whether the water enters through the roof, around openings, or from ground moisture rising upward. A trained professional knows how to avoid these vulnerable areas. A rented pressure washer does not. Soft Washing vs Power Washing Stucco: What’s the Difference? When it comes to cleaning stucco homes, this is the most important question homeowners need to ask. Choosing the right cleaning method can mean the difference between a clean, long-lasting exterior and costly damage caused by excessive water pressure. Power Washing Power washing uses very high water pressure, often over 3,000 PSI, to blast dirt off a surface. It works well on concrete, brick, and driveways. On stucco, that same pressure can chip the finish or drive water into the wall. Soft Washing Soft washing uses low pressure water combined with a gentle, EPA-registered cleaning solution. Instead of blasting dirt off, it breaks down algae, mold, and grime at the surface so it rinses away easily. This is the method most professionals use on stucco, painted siding, and roofs. Method Pressure Used Safe for Stucco? Power washing High (2,000+ PSI) Risky without training Soft washing Low, with cleaning solution Yes, when done correctly If a company arrives and uses the same high-pressure cleaning method for every surface, consider it a red flag. A professional cleaning service adjusts its approach to suit your stucco, ensuring a safe and effective clean rather than forcing a one-size-fits-all solution. How to Clean Stucco Exterior Safely If you want your stucco cleaned the right way, here is what a safe process looks like: Inspect the walls first. A good crew checks for existing cracks, loose stucco, or damaged caulking before any water touches the wall. Use low pressure settings. Anything under 500 to 800 PSI is generally considered safe for painted or textured stucco. Apply a soft wash solution. This lifts algae, mildew, and dirt without forcing water into the wall. Rinse from a safe distance. Keeping the nozzle several feet back and using a wide fan spray protects the surface. Seal any gaps before washing. Loose trim, cracked caulking, or open weep holes should be flagged and protected first. Let it dry fully. Stucco needs time to dry out completely between cleanings to avoid trapping moisture. Skipping any of these steps is how DIY stucco cleaning turns into an expensive repair bill. If you are searching for a company that offers professional power washing in San Antonio, ask directly whether they soft wash stucco or treat every surface the same way. Thinking about tackling it yourself this weekend? Get a free estimate first and compare the cost of a rental machine against a professional job. Most homeowners are surprised by how close the price really is. Signs Your Stucco Home Needs Cleaning You do not need to wait for stucco to look bad to consider a wash. Watch for: Dark streaks running down from the roofline Green or black patches, especially on shaded, north-facing walls A chalky, dull finish where the color used to look bright Pollen or dust buildup after Hill Country storms roll through San Antonio’s mix of heat, humidity, and limestone dust means stucco homes tend to collect grime faster than homes in drier climates. Regular cleaning, done the right way, keeps small buildup from turning into stains that are hard to remove. Why Choose River City Painting? River City Painting has spent over 5 years helping San Antonio homeowners keep their exteriors clean, protected, and looking their best. With more than 260 five-star reviews on Google, homeowners across the area trust our crews to know the difference between a surface that can handle full pressure and one, like stucco, that needs a gentler touch. We offer full power washing service, with a special focus on safe stucco house washing in San

power washing home exterior in san antonio
San Antonio

How to Remove Mold and Mildew from Exterior Walls in San Antonio?

Mold and mildew on exterior walls are a common problem for homeowners in San Antonio, where heat, humidity, and seasonal rain create the perfect conditions for growth. What may start as a few dark spots on your siding, stucco, or brick can quickly spread, affecting your home’s appearance and potentially causing long-term surface damage.  The good news is that mold and mildew can often be removed with the right cleaning methods and preventative maintenance. In this guide, we’ll explain how to safely remove mold from exterior walls, what causes it to grow, and how to keep it from returning. Why Mold and Mildew Grow So Easily on Homes in San Antonio? San Antonio sits in a humid subtropical zone. Mornings often start near 80% humidity, and summer highs regularly push past 95 degrees. That combination of heat, moisture, and shade is exactly what mold, mildew, and green algae need to grow. Homes near the San Antonio River or shaded lots close to Brackenridge Park tend to see growth faster because the air stays damper longer under tree cover. North-facing walls and areas behind bushes are the most common trouble spots because they dry out slower after rain. Signs You Have Mold or Mildew on Your Exterior Walls Before you grab a hose, confirm what you are dealing with. Look for these signs: Black, green, or gray-green splotches on siding, brick, or stucco A musty smell near exterior walls, especially after rain Streaky, slimy patches on north-facing or shaded walls Spots that spread wider every few weeks If you see any of these, the growth needs to come off soon. Left alone, it eats into paint and siding material over time. Difference Between Mold, Mildew, and Algae These three often get lumped together, but they behave a little differently: Mold is usually black, blue-green, or gray and can look fuzzy or slimy. Mildew is a type of mold that shows up as a flat, powdery gray or white coating. Algae looks green or gray-green and gives walls a streaky, slick appearance, especially on the shaded side of a house. The cleaning approach below works for all three. How to Remove Mold From Exterior Walls? Follow these steps for a safe, effective clean on brick, stucco, or fiber cement siding. Step 1: Gather Your Supplies You will need rubber gloves, safety goggles, a stiff outdoor brush, a garden hose, and a cleaning solution. Skip the ladder and work on tall walls. That job is safer left to a pro with the right equipment. Step 2: Mix a Safe Cleaning Solution Mix one cup of oxygen bleach or household bleach into one gallon of water. Never mix bleach with ammonia or other cleaners, since this creates dangerous fumes. Test the solution on a small hidden spot first. Step 3: Apply, Scrub, and Rinse Spray or brush the solution onto the moldy area and let it sit for 10 to 15 minutes. Scrub gently with the brush, working in small sections. Rinse thoroughly with clean water from the top down. Step 4: Protect Plants and Pets Wet down nearby plants before you start and rinse them again after. Bleach solutions can harm grass and flower beds if they run off without dilution. How to Remove Mildew From House Siding Different siding materials need slightly different care: Vinyl siding: A soft brush and the bleach solution above work well. Avoid abrasive scrubbers that scratch the surface. Stucco: Stucco is porous and absorbs moisture, so mildew can run deeper than it looks. A longer soak time with a gentle brush usually does the trick. Brick: Brick and mortar can trap mildew in tiny pores. A stiffer brush and a slightly longer contact time help lift it out. If mildew keeps returning on the same wall, no matter how often you clean it, that is usually a sign of a bigger moisture or shade problem that scrubbing alone will not fix. Power Washing Mold Off Your House: What to Know? Scrubbing by hand works for small spots, but a full wall covered in mold or algae calls for more power. A professional power washing service uses controlled water pressure to strip mold, algae, and grime off siding, stucco, and brick without damaging the surface underneath. DIY pressure washers sold at hardware stores can actually cause damage if the pressure is set too high or held too close to the wall. Too much pressure can crack stucco, strip paint, or force water behind siding, which leads to a whole new moisture problem. That is the main reason homeowners in San Antonio often bring in a trained crew instead of renting equipment for a one-time job. Ready to get your walls looking new again? Get a free power washing estimate and skip the guesswork. How Often Should You Clean San Antonio Exterior Walls? Because of the local humidity, most San Antonio homes benefit from an exterior wash once a year. Homes in shaded areas, near Alamo Heights tree cover, or close to sprinkler overspray may need it every 6 to 9 months. Check out this guide on how often to power wash your home for a schedule based on your specific property. Preventing Mold and Algae From Coming Back A clean wall will not stay clean forever without a few habits in place. Trim bushes and trees so walls get more sun and air movement Clean gutters twice a year so water does not run down siding Point sprinklers away from the house Repaint with mold-resistant exterior paint after a deep clean A fresh, well-maintained exterior also holds up better against San Antonio’s heat and storms. You can read more about the benefits of power washing if you want to see the full list of reasons regular cleaning pays off. Even homeowners out in the Boerne Hill Country deal with the same seasonal buildup, so this routine applies well beyond the city limits too. If your walls have not been cleaned in over a year, now is a

Scroll to Top